Would you like to save this recipe?
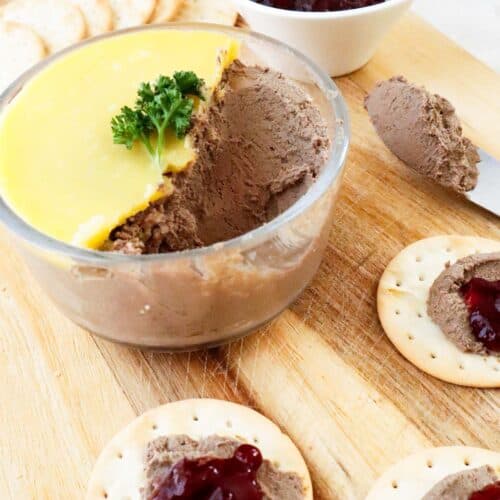
Mild and Easy Chicken Liver Pâté (Vistas Aknu Pastēte)
This easy chicken liver pâté is smooth, mild, and creamy, made without alcohol. The secret is the parsnip, a Baltic addition that brings a natural sweetness and takes the sharp edge off the taste of liver. One pan, a food processor or stick blender, and about 30 minutes of mostly hands-off simmering.
Equipment
- 1 large frying pan
- 1 Food processor stick blender, thermomix, blender,...
Ingredients
- 2 pounds chicken livers
- 1 1/2 sticks butter 12 Tablespoons or 165 grams
- 1 small onion
- 1 bay leaf
- 1 small celery stick thinly sliced
- 1 small parsnip peeled and sliced
- 1 lemon Juice of 1/2 lemon
- 1/4 tsp nutmeg
- 1/4 tsp salt
Instructions
- Prepare the veggies: Slice up the onion, peel and chop the parsnip, and wash and finely slice the celery stalk. You’ll want to really make sure you slice the celery finely, otherwise you may get these strands of celery in your pâté.
- Clean the livers: If soaking in milk, do that now. Cover with milk and refrigerate for one to two hours, then rinse and pat dry. Otherwise, wash under cold running water until the water runs clear. Trim away the connective tissue and remove any green-tinged pieces.
- Sauté the veggies: Heat 2 tablespoons of butter in a large skillet over medium-high heat. Add the onion, parsnip, and celery. Sauté for about 5 minutes until the onion becomes translucent. Remove from the pan and place on a plate/bowl.
- Cook the chicken livers: Add another 2 tablespoons of butter to the same pan. Add the chicken livers and sauté on medium heat for 5-7 minutes until they are slightly browned. You are not cooking them through yet, just getting some color on them.
- Simmer everything together: Add the veggies you put aside, one cup water and the bay leaf to the chicken livers. Simmer for about 20 minutes on medium-low heat, stirring often and making sure the livers are evenly cooked. Don’t brown. Just simmer gently. The pan should stay moist and not dry, so if you need to add more water, you can, but not too much. At the end of the 20 minutes, most of the water should have evaporated.
- Test for doneness: After 20 minutes, taste a piece of celery. If it’s cooked and not crunchy, remove the pan from heat and remove the bay leaf. If not, add a bit more water and continue to simmer until done. For the chicken livers: the internal temperature should read 165°F (74°C). You can cut one open and there should be just a faint hint of pink.
- Blend immediately while still very warm. Transfer everything straight from the pan to the food processor or high-powered blender. Warm livers emulsify the butter into a smooth, creamy texture.
- Add final ingredients: Add the rest of the butter, lemon juice, nutmeg, and salt to taste. Blend until completely smooth and creamy. Taste and adjust seasoning.
- Refrigerate and serve: Transfer to glass jars or ramekins. Press plastic wrap (cling wrap) directly onto the surface before sealing, or pour a thin layer of melted butter over the top instead. The butter seal is the more traditional method and looks beautiful. Press a sprig of thyme, parsley or a few pink peppercorns in before it sets if you like. Refrigerate for at least 2 hours.
- Serve at room temperature. Take the pâté out of the fridge about 20 minutes before serving. It's stiffer when cold and the flavor is more muted.
Notes
Tips for the Best Pâté
- Slice the celery finely. It’s the one vegetable that won’t fully disappear in the blender. Thin slices mean no stringy bits.
- Check for green before you start. Any green-tinged piece of liver goes in the bin. It’s bile, and it makes pâté bitter.
- Season at the end. Butter and livers vary in saltiness. Always taste and season after blending, not before.
- Let it rest before serving. The pâté is good after 2 hours but noticeably better the next day. Take it out of the fridge about 20 minutes before serving. Cold pâté is stiffer and the flavor is more muted.
- Refrigerator: The butter seal is the more traditional method and keeps the pâté for up to 5 days. To do it: melt a few tablespoons of butter gently, let it cool slightly, then pour a thin layer directly over the surface of the pâté and refrigerate until set. If you’d rather use plastic wrap (cling wrap), press it directly onto the surface with no air gaps. Without either, the surface will turn gray within a day or two. Not spoiled, just not pretty.
- Freezer: I haven’t personally frozen this pâté, but readers report it freezes well in portions for up to 3 months. Defrost overnight in the fridge and give it a stir before serving. The texture may be slightly less smooth after thawing.
- Make ahead: The flavor is genuinely better on day two. Make it the night before and you won’t have to think about it again until people sit down.
Nutrition
Serving: 1personCalories: 311kcalCarbohydrates: 7gProtein: 20gFat: 23gSaturated Fat: 13gPolyunsaturated Fat: 2gMonounsaturated Fat: 6gTrans Fat: 1gCholesterol: 437mgSodium: 220mgPotassium: 379mgFiber: 2gSugar: 2gVitamin A: 13098IUVitamin C: 32mgCalcium: 28mgIron: 10mg
Tried this recipe?Let us know how it was!