Easy Chicken Liver Pâté Recipe (Vistas Aknu Pastēte)
This easy chicken liver pâté recipe is smooth, mild and creamy, and made without alcohol. One pan, a blender or a food processor and about 30 minutes of mostly hands-off simmering. The base is simple: chicken livers, butter, onion, celery, and parsnip. The parsnip is the thing that makes it Baltic rather than French, and it brings a natural sweetness that takes the sharp edge off the liver without masking it.

Would you like to save this recipe?
If you’ve always thought of liver as an acquired taste, this recipe might change your mind. Serve it on a charcuterie board with crackers and cornichons or lingonberry jam when people come over or spread it on white toast, or dark rye bread for a savory breakfast or brunch.
This recipe for chicken liver pâté (“vistas aknu pastēte”) came from Frida, an old Latvian friend of my mother’s. My mother made it for years and now I do too. Latvian recipes like this one are a big part of why I started this blog.
This post may contain Amazon affiliate links. As an Amazon Associate I earn from qualifying purchases, at no extra cost to you.
If you are curious about how I develop and test recipes before I publish them, you can read about my recipe creation process here.
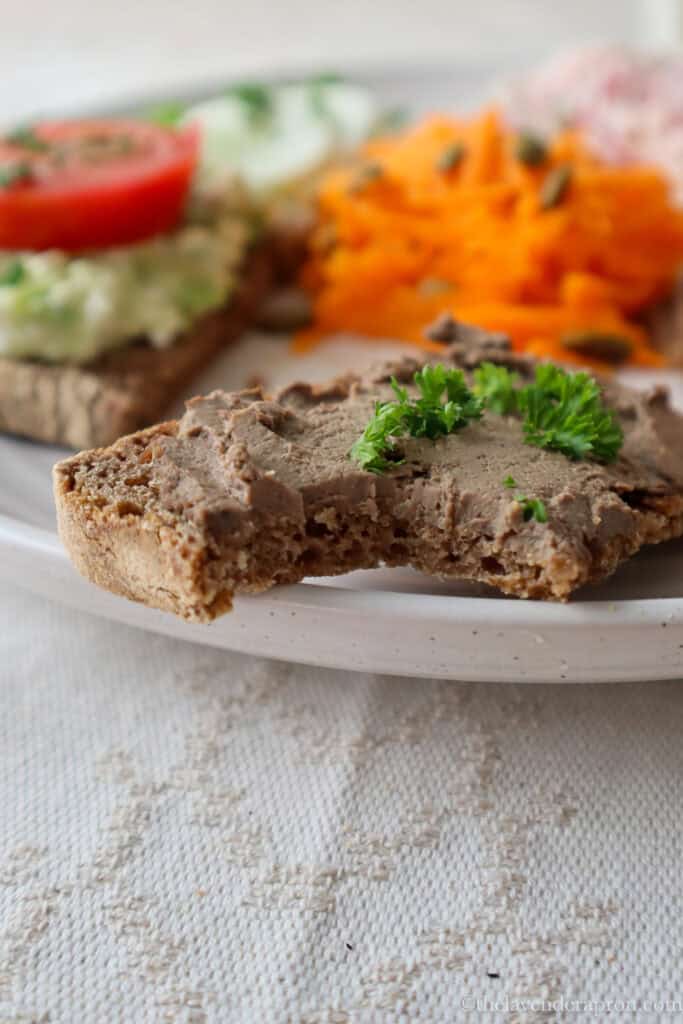
Table of contents
- What Makes This Homemade Chicken Liver Pâté Special
- Equipment
- Ingredients to Make Easy Chicken Liver Pâté
- Substitutions and Additions
- How to Make Homemade Chicken Liver Pâté
- Tips for the Best Pâté
- The Baltic Version
- What to Serve with Chicken Liver Pâté
- Storage
- Troubleshooting
- FAQ
- Recipe for Mild and Easy Chicken Liver Pâté
What Makes This Homemade Chicken Liver Pâté Special
Most chicken liver pâté recipes use a hot, fast sear. This one doesn’t. Everything simmers slowly together with the vegetables in a little water. It’s what keeps the flavor mild and the texture smooth. The parsnip is the other thing. It’s not a French addition, but a Baltic one, and it brings a natural sweetness that balances the liver without covering it up.
There’s no alcohol in this recipe either. Most classic pâté recipes call for brandy or cognac to smooth out the liver flavor. The parsnip and the slow simmer do that here instead.
Chicken liver is organ meat, which puts some people off before they’ve even tried it. This recipe is for them.
Chicken liver is also one of the cheapest cuts you can buy. It costs a fraction of what you’d pay for a good store-bought pâté, and it tastes better too. It also keeps for up to 4 days in the fridge, which makes it one of the better things you can make on a Sunday afternoon and forget about until people arrive.
I lived in France for many years and ate a lot of pâté, the kind you buy from a good local charcuterie, cut off from a big block and wrapped in paper. Those are excellent. They’re also richer, heavier, and more intensely liver-flavored than this. I genuinely prefer this Baltic version. It’s lighter, milder, and somehow more useful as an everyday thing.
Equipment
You don’t need much for this recipe, which is part of the appeal.
- Large skillet or frying pan. Big enough to hold the livers and vegetables comfortably for the simmer. A 10 to 12 inch pan works well.
- Food processor, high-powered blender, Thermomix, or stick blender. Any of these works. A food processor gives the smoothest result. A stick blender is the most convenient for small batches. A regular blender is fine too, the texture just won’t be quite as smooth.
- Glass jars or ramekins. For storing and serving. The pâté looks beautiful served straight from a small jar, especially with the butter seal on top.
- Meat thermometer. Optional but useful if you’re new to cooking liver. You’re looking for 165°F (74°C) internal temperature.
Ingredients to Make Easy Chicken Liver Pâté
See the recipe card below for full quantities.
- Chicken livers – Free-range or pasture-raised if you can find them, and fresh. Look for livers that are plump and have a clean smell. Before cooking, check each one: any bit with a green tinge should be cut off and discarded. That tinge is bile, and even a small amount can make the whole batch taste bitter.
- Butter – Unsalted butter or salted butter, but if you use salted, then adjust the seasoning. Grass-fed butter works well here.
- Onion – I use yellow, but any kind will do.
- Celery – Slice it as finely as you can. Celery has long fibers that won’t break down fully in the blender, and if the pieces are too thick you’ll end up with stringy bits in the finished pâté.
- Parsnip – It brings a natural sweetness that balances the liver. Don’t skip it. It’s what makes this recipe Baltic rather than French.
- Bay leaf – Adds a woodsy note to the simmering liquid.
- Lemon juice – Just enough to brighten everything at the end.
- Nutmeg – Optional, but it gives the pâté a subtle warmth. I always add it.
Substitutions and Additions
- Butter: Duck fat or goose fat add savory depth and make this dairy-free. Use the same quantity.
- Duck livers: These work well in place of chicken livers and give a slightly richer, deeper flavor. The method is exactly the same.
- For a stronger flavor: Reduce the parsnip by half.
- For an even milder result: Soak the livers in milk for one to two hours before cooking, then rinse and pat dry. The parsnip and long simmer already do a lot of this work, so it’s optional.
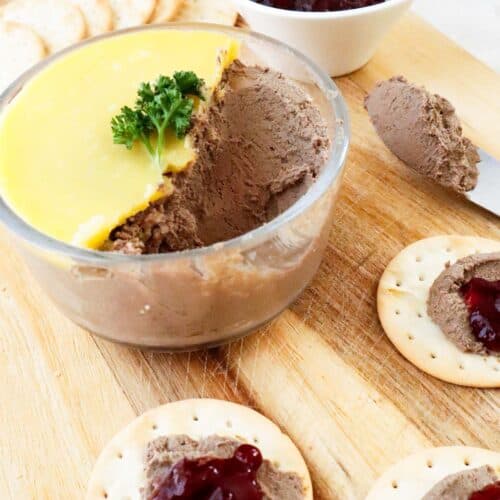
- A lingonberry layer: In Latvia, they sometimes put a thin layer of lingonberry jelly over the chilled pâté. It sets into a ruby layer that seals the surface and adds a tartness that works well against the richness.
How to Make Homemade Chicken Liver Pâté
Prepare the veggies: Slice up the onion, peel and chop the parsnip, and wash and finely slice the celery stalk. You’ll want to really make sure you slice the celery finely, otherwise you may get these strands of celery in your pâté.
Clean the livers: If soaking in milk, do that now. Cover with milk and refrigerate for one to two hours, then rinse and pat dry. Otherwise, wash under cold running water until the water runs clear. Trim away the connective tissue and remove any green-tinged pieces.
Sauté the veggies: Heat 2 tablespoons of butter in a large skillet over medium-high heat. Add the onion, parsnip, and celery. Sauté for about 5 minutes until the onion becomes translucent. Remove from the pan and place on a plate/bowl.
Cook the chicken livers: Add another 2 tablespoons of butter to the same pan. Add the chicken livers and sauté on medium heat for 5-7 minutes until they are slightly browned. You are not cooking them through yet, just getting some color on them.
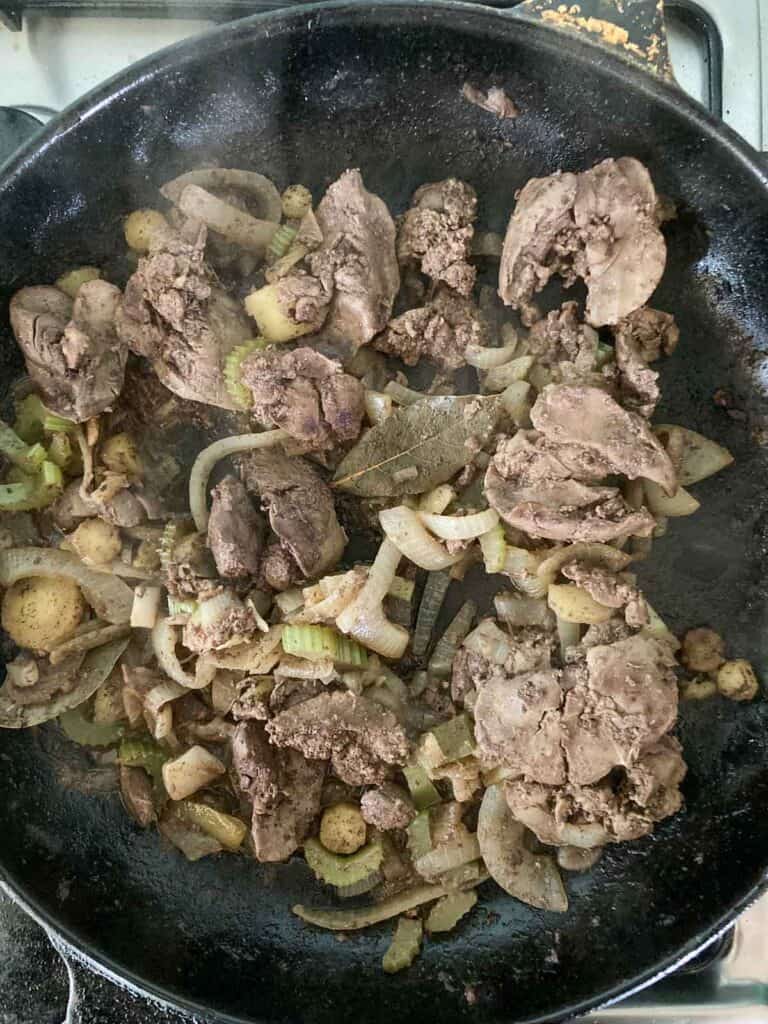
Simmer everything together: Add the veggies you put aside, one cup water and the bay leaf to the chicken livers. Simmer for about 20 minutes on medium-low heat, stirring often and making sure the livers are evenly cooked. Don’t brown. Just simmer gently. The pan should stay moist and not dry, so if you need to add more water, you can, but not too much. At the end of the 20 minutes, most of the water should have evaporated.
Test for doneness: After 20 minutes, taste a piece of celery. If it’s cooked and not crunchy, remove the pan from heat and remove the bay leaf. If not, add a bit more water and continue to simmer until done. For the chicken livers: the internal temperature should read 165°F (74°C). You can cut one open and there should be just a faint hint of pink.
Blend immediately while still warm. Transfer everything straight from the pan to the food processor or high-powered blender. Warm livers emulsify the butter into a smooth, creamy texture.
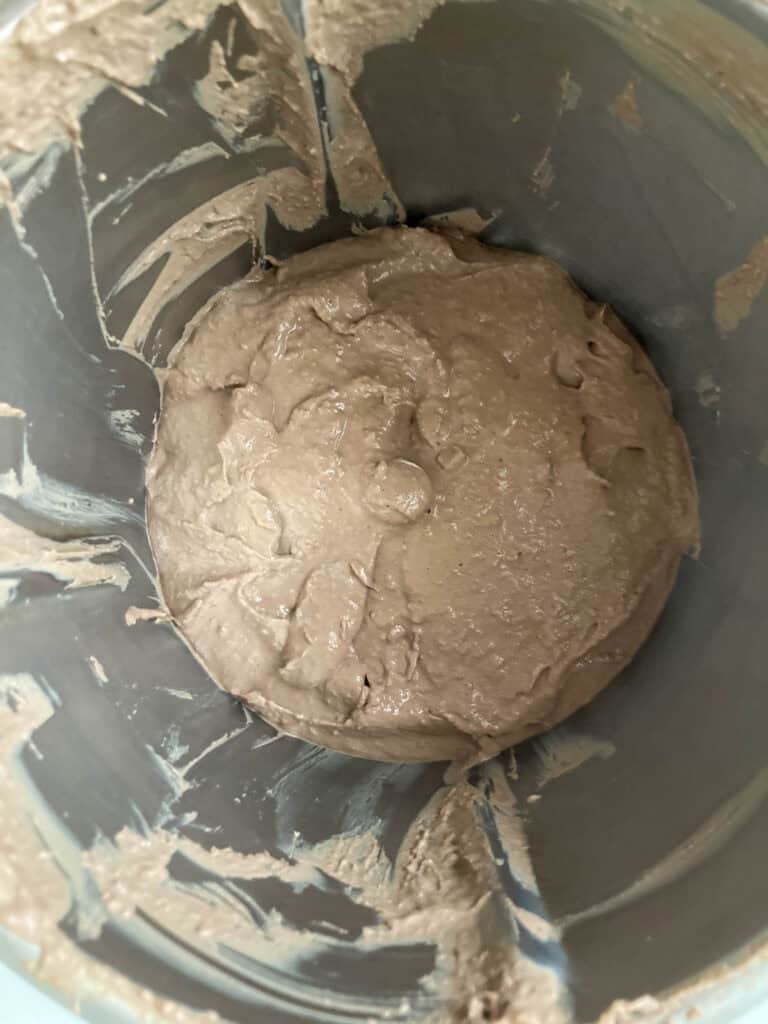
Add final ingredients: Add the rest of the butter, lemon juice, nutmeg, and salt to taste. Blend until completely smooth and creamy. Taste and adjust seasoning.
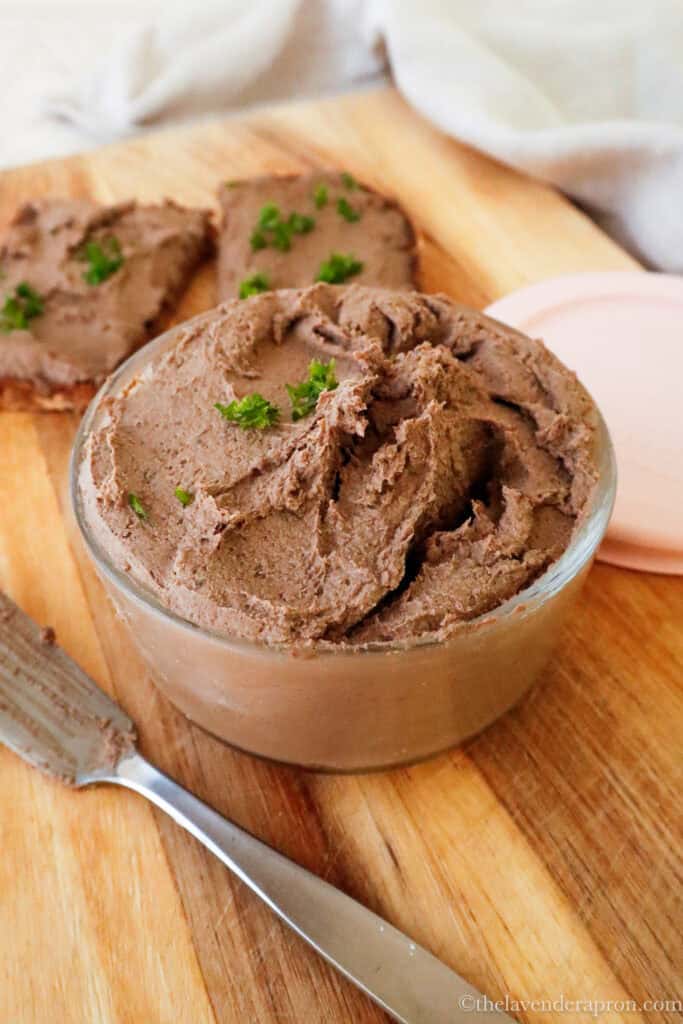
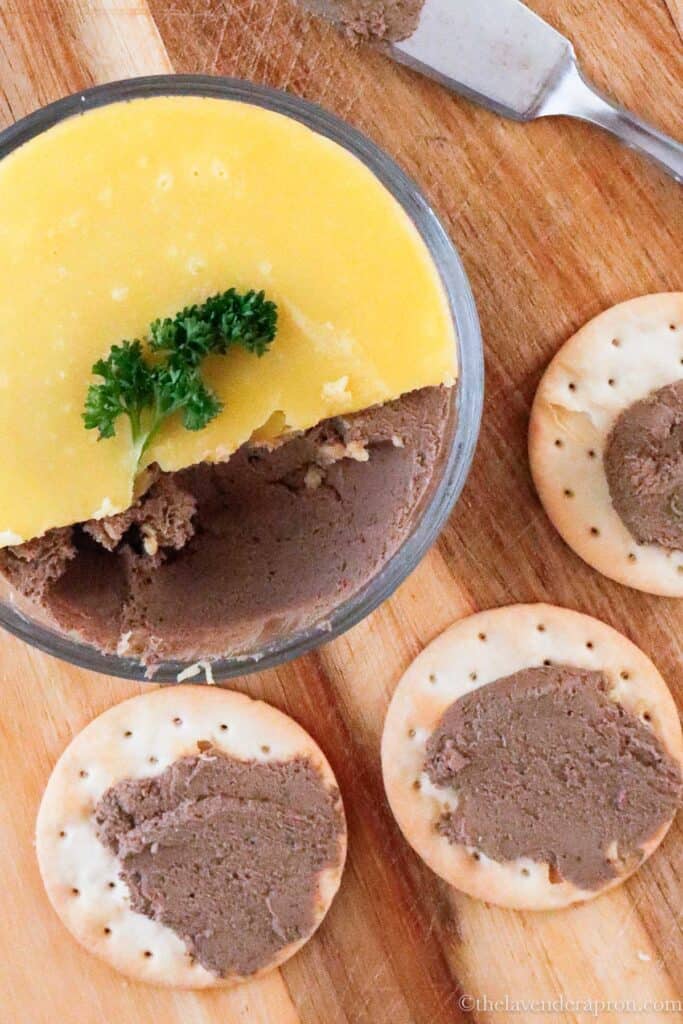
Refrigerate and serve: Transfer to glass containers or ramekins. Press plastic wrap (cling wrap) directly onto the surface before sealing, or pour a thin layer of melted butter over the top instead. The butter seal is the more traditional method and looks beautiful. Press a sprig of thyme, parsley or a few pink peppercorns in before it sets if you like. Refrigerate for at least 2 hours.
Tips for the Best Pâté
- Slice the celery finely. It’s the one vegetable that won’t fully disappear in the blender. Thin slices mean no stringy bits.
- Check for green before you start. Any green-tinged piece of liver goes in the bin. It’s bile, and it makes pâté bitter.
- Season at the end. Butter and livers vary in saltiness. Always taste and season after blending, not before.
- Let it rest before serving. The pâté is good after 2 hours but noticeably better the next day. Take it out of the fridge about 20 minutes before serving. Cold pâté is stiffer and the flavor is more muted.
The Baltic Version
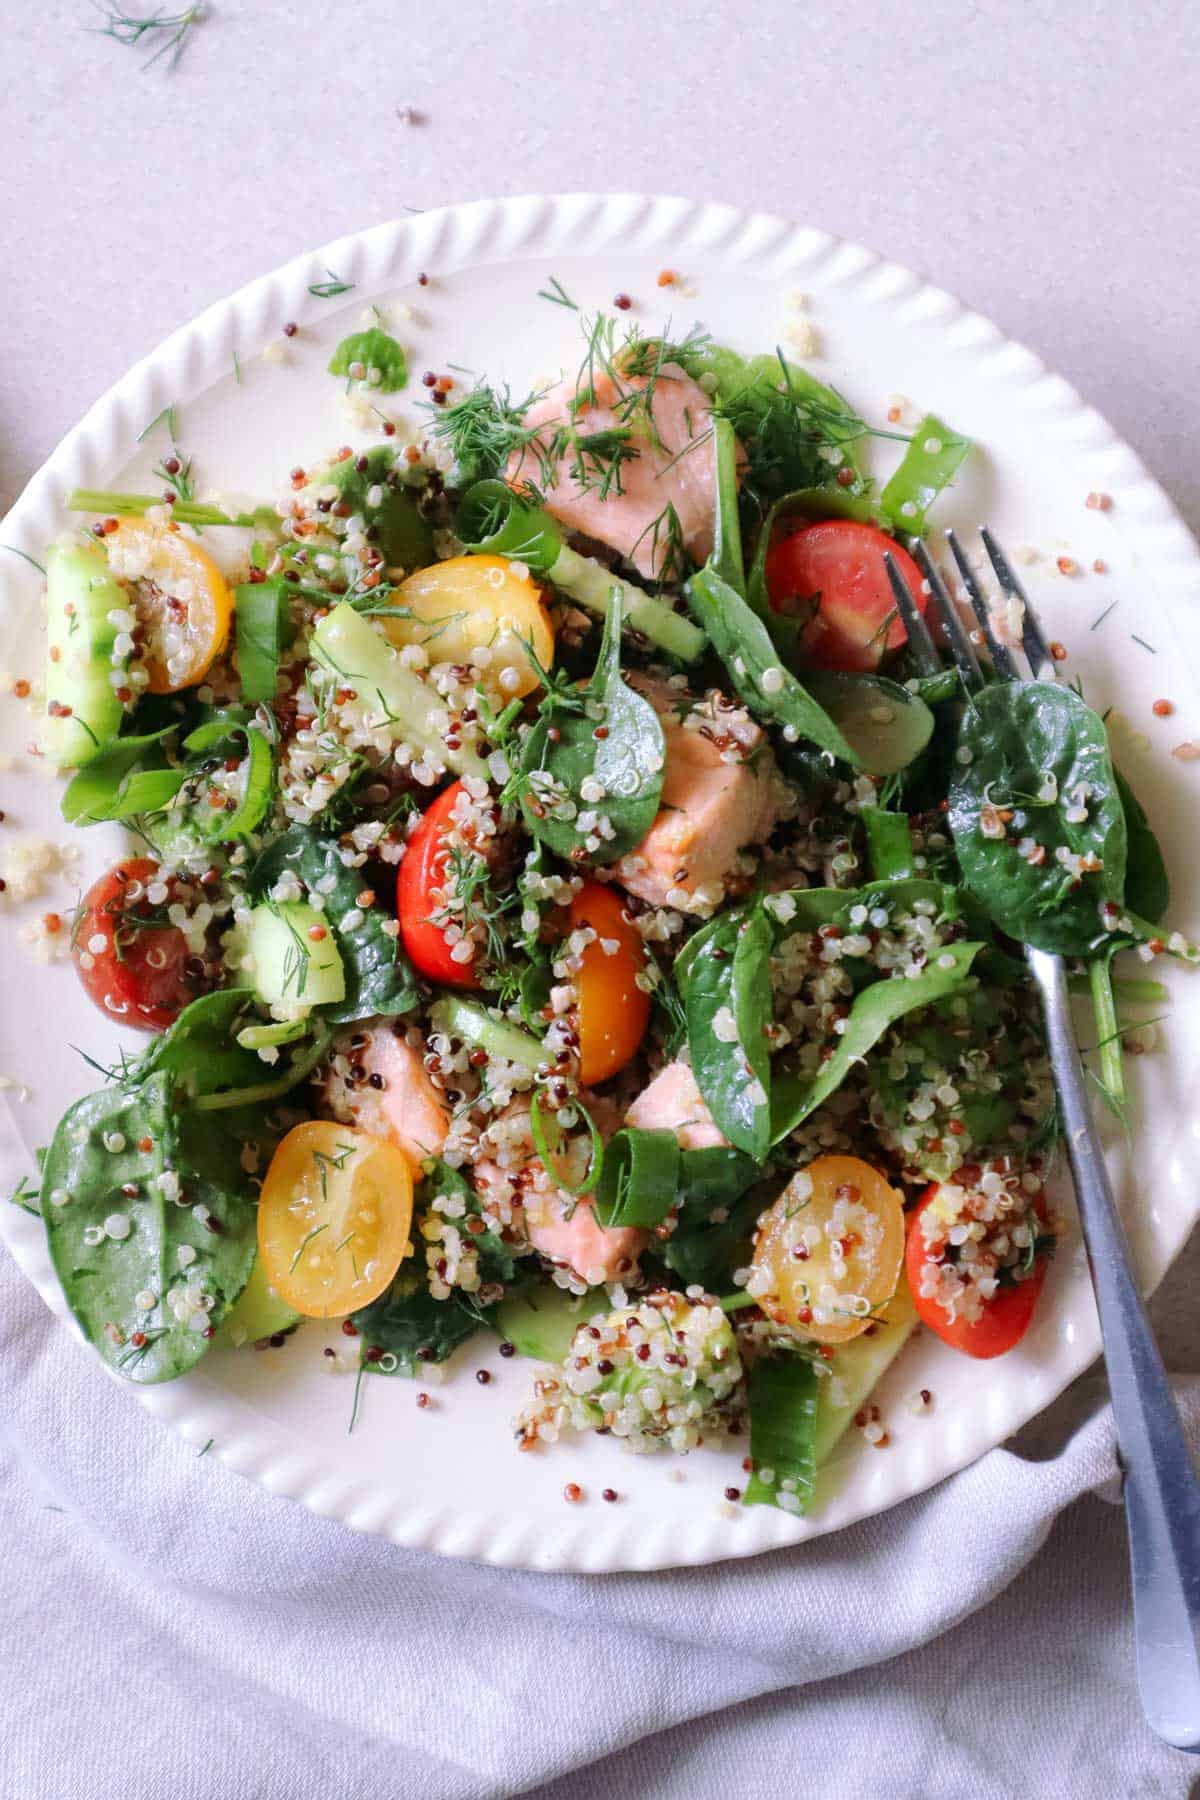
In Latvia, chicken liver pâté is everyday food. Not a dinner party dish, not something you make a fuss about. It turns up as a savory breakfast or lunch on a plate with whatever else is going: a creamy cucumber salad, a simple red radish salad, or grated carrot salad, cottage cheese on toast with tomato, or cottage cheese and avocado with smoked salmon on toast. Everything on one plate, eaten at the kitchen table.
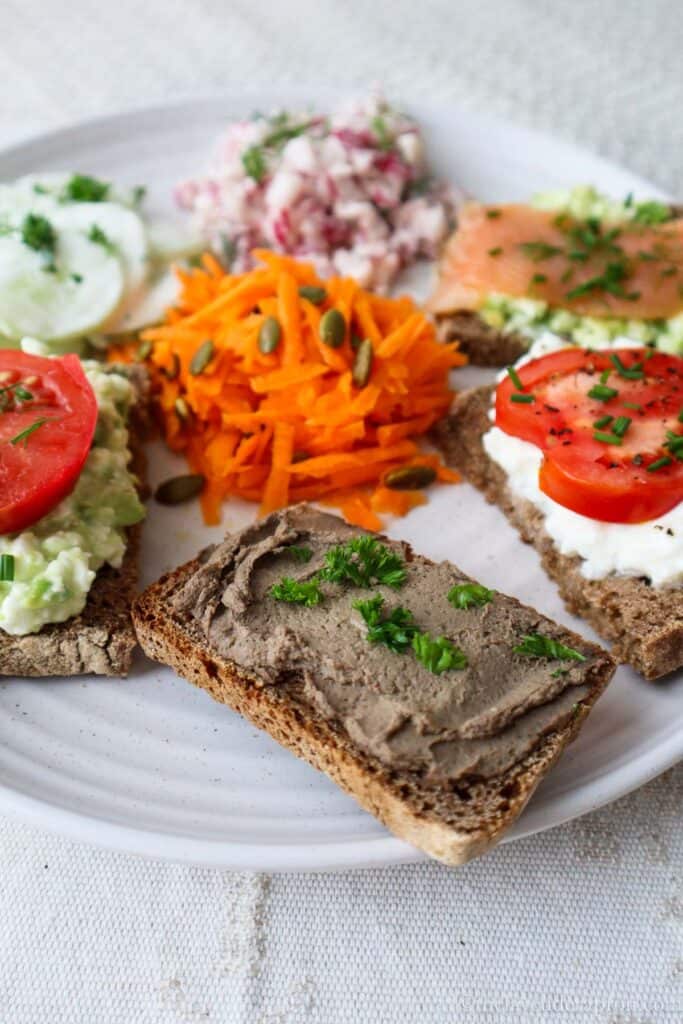
This is what that plate actually looks like.
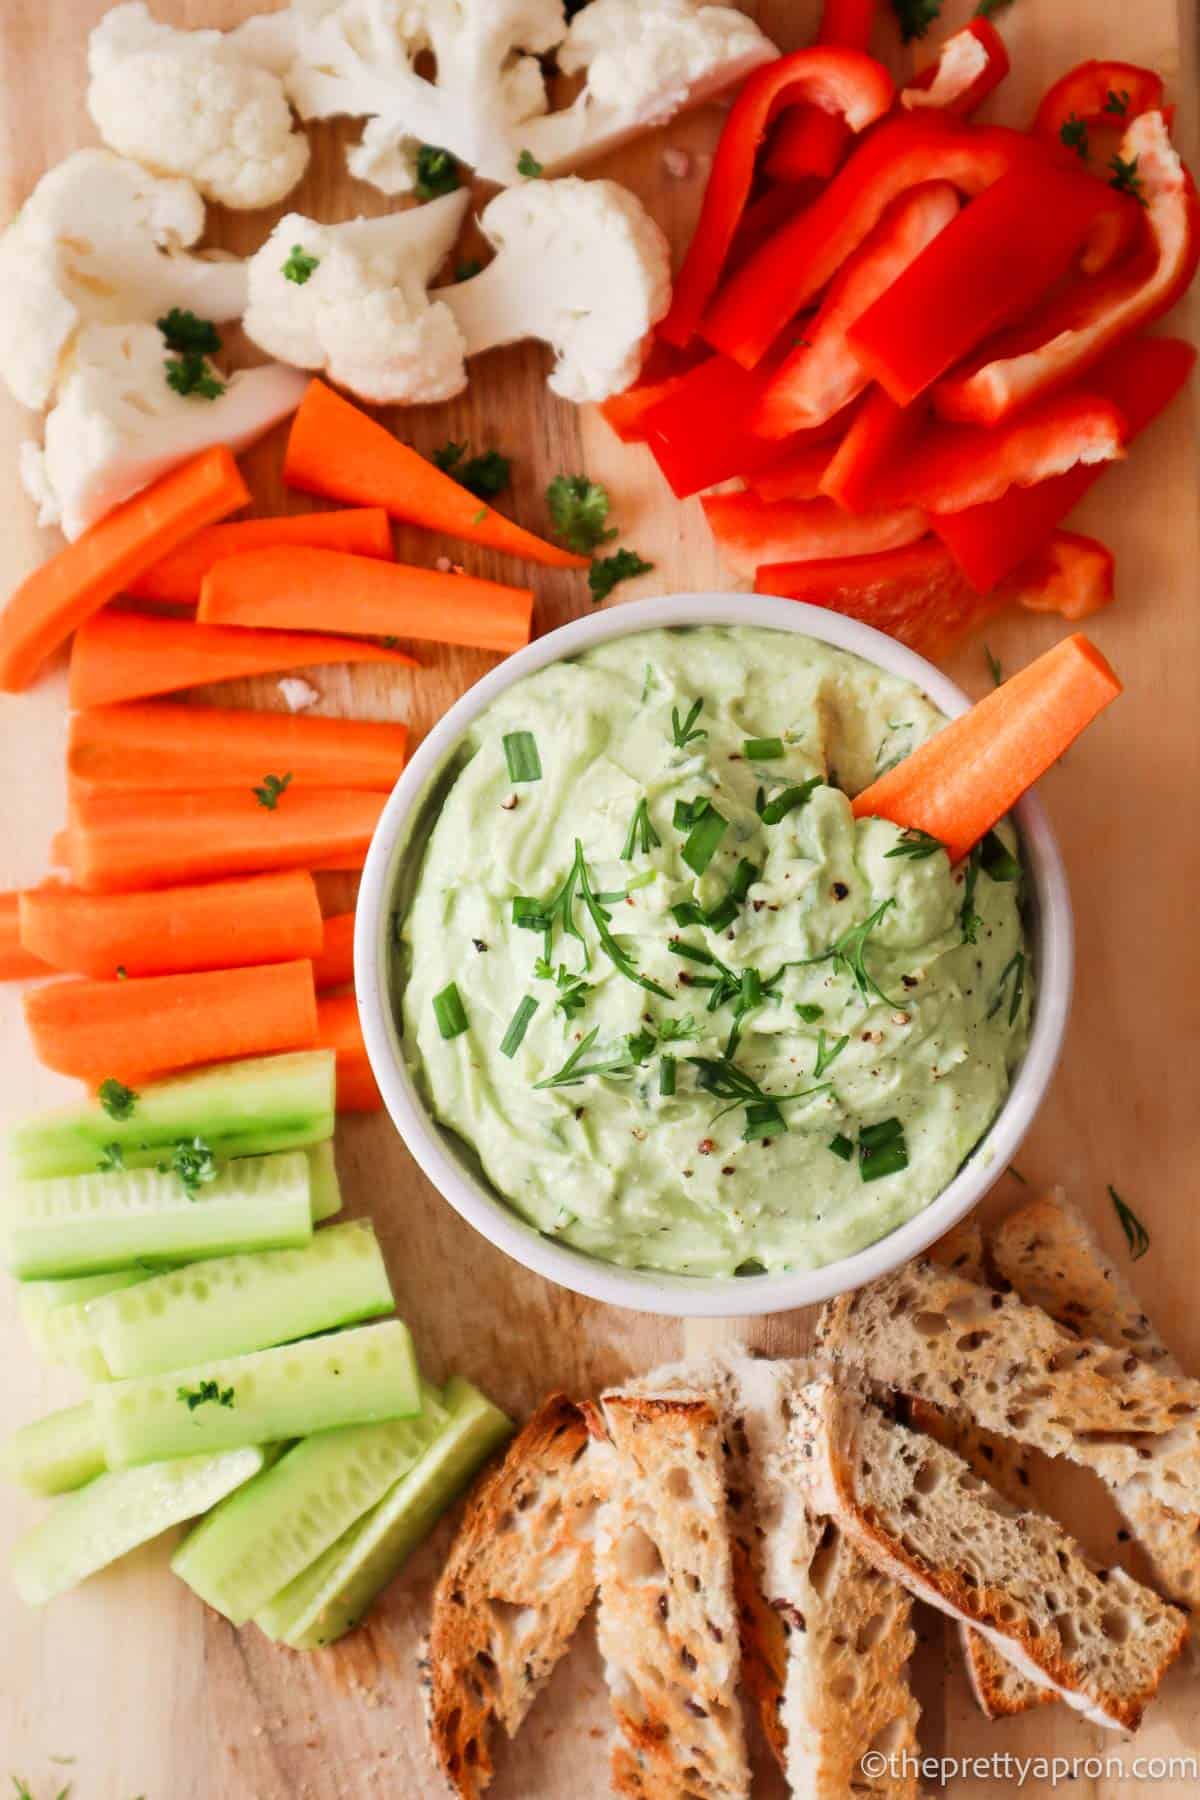
What to Serve with Chicken Liver Pâté
- On toasted bread or water crackers – Thin and crisp, so the pâté is the thing you taste.
- On dark rye bread – Toasted and plain, or made into ķiploku grauzdiņi: rye slices pan-fried in butter until crisp, then rubbed with a raw garlic clove. The Latvian version of garlic bread, and it goes particularly well here.
- With pickles – Cornichons is the French habit. Pickled cucumber slices work just as well. The sharpness cuts through the richness.
- With something sweet and tart – Lingonberry jam, cranberry relish, or a good red onion chutney.
- As a canapé – Spread on toasted baguette slices and served with drinks while people arrive. It works particularly well before a more substantial French meal, like the roast chicken with chestnuts.
- On a board for entertaining – Pâté, rye bread and crackers, cornichons, and a small jar of lingonberry jam.
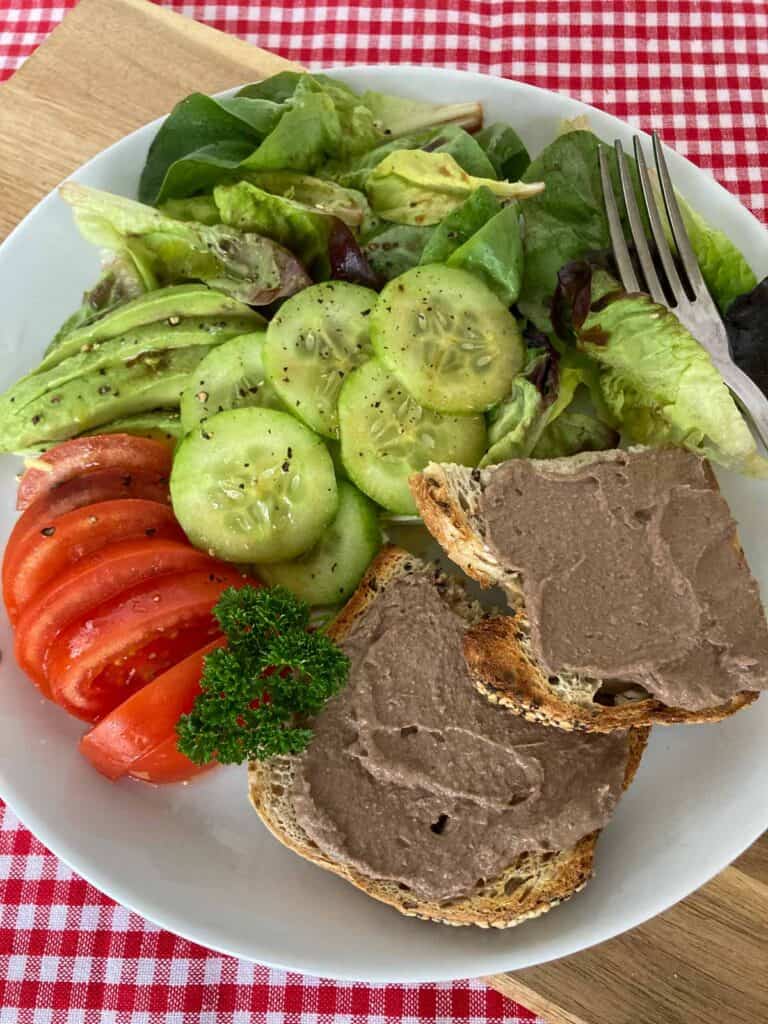
- As an open sandwich, with lettuce, sliced tomatoes, cucumbers and a drizzle of oil and balsamic vinegar. More of a lunch than a snack.
Storage
- Refrigerator: The butter seal is the more traditional method and keeps the pâté for up to 5 days. To do it: melt a few tablespoons of butter gently, let it cool slightly, then pour a thin layer directly over the surface of the pâté and refrigerate until set. If you’d rather use plastic wrap (cling wrap), press it directly onto the surface with no air gaps. Without either, the surface will turn grey within a day or two. Not spoiled, just not pretty. The butter seal sets into a clean, firm layer that looks good enough to serve straight from the jar.
- Freezer: I haven’t personally frozen this pâté, but readers report it freezes well in portions for up to 3 months. Defrost overnight in the fridge and give it a stir before serving. The texture may be slightly less smooth after thawing.
- Make ahead: The flavor is genuinely better on day two. Make it the night before and you won’t have to think about it again until people sit down.
For more Baltic and European brunch ideas, the avocado and shrimp toast and cottage cheese sandwich recipes are both worth a look.
Troubleshooting
- My pâté turned out grainy. Almost always blending when cold. Push it through a fine sieve and blend in a little extra softened butter. It won’t be perfectly smooth, but it helps. Eat it on rye bread, or a seeded loaf, no one will notice the texture.
- My pâté turned out bitter. Three possible causes: livers weren’t fresh, green-tinged pieces weren’t removed, or the heat was too high. The slow simmer protects against the third.
- My pâté won’t set. Too much liquid left in the pan before blending. Refrigerate it for longer and it will firm up as it chills.
- The top has gone grey. Oxidation. Not spoiled. Scrape it off, or prevent it next time with plastic wrap pressed directly onto the surface or a butter seal.

FAQ
It can be, but this recipe is designed to fix that. The parsnip and the long gentle simmer take the sharp edge off considerably. If liver has put you off in the past, start here.
Chicken liver should reach an internal temperature of 165°F (74°C). Cut one open: a faint hint of pink at that temperature is fine. Still red means a few more minutes. Brown all the way through means overcooked and the texture will suffer for it.
Both are liver-based and spreadable, but foie gras is made from fattened duck or goose liver and has a much richer, fattier flavor. This pâté is lighter, milder, and considerably more affordable. Think everyday brunch rather than special occasion.
Chicken liver is one of the most nutrient-dense organ meats you can eat, very high in vitamin B12, iron, folate, and selenium. It’s rich, so a little goes a long way. Worth knowing if you’re pregnant: the high vitamin A content means liver is one to avoid during pregnancy.
A stick blender works well. A high-powered blender works even better. A regular blender is fine too, the texture just won’t be quite as smooth.
I don’t. I find this pâté made with parsnip, celery and onion is already very mild. But if you would like to make it more mellow and slightly sweeter, you can soak the livers in milk.
Yes, and this recipe does exactly that. Most classic pâté recipes use brandy or cognac to smooth out the liver flavor. Here the parsnip and the slow simmer do that job instead. You won’t miss it.
If you’re putting together a Baltic brunch table, the canned salmon and cream cheese toast belongs alongside this, and so does the Baltic-style asparagus soup with dill if you’re making a bigger spread. For more recipes from the Latvian and Baltic table, head to the Baltic recipes page.
Recipe for Mild and Easy Chicken Liver Pâté
Would you like to save this recipe?
Mild and Easy Chicken Liver Pâté (Vistas Aknu Pastēte)
Equipment
- 1 large frying pan
- 1 Food processor stick blender, thermomix, blender,…
Ingredients
- 2 pounds chicken livers
- 1 1/2 sticks butter 12 Tablespoons or 165 grams
- 1 small onion
- 1 bay leaf
- 1 small celery stick thinly sliced
- 1 small parsnip peeled and sliced
- 1 lemon Juice of 1/2 lemon
- 1/4 tsp nutmeg
- 1/4 tsp salt
Instructions
- Prepare the veggies: Slice up the onion, peel and chop the parsnip, and wash and finely slice the celery stalk. You’ll want to really make sure you slice the celery finely, otherwise you may get these strands of celery in your pâté.
- Clean the livers: If soaking in milk, do that now. Cover with milk and refrigerate for one to two hours, then rinse and pat dry. Otherwise, wash under cold running water until the water runs clear. Trim away the connective tissue and remove any green-tinged pieces.
- Sauté the veggies: Heat 2 tablespoons of butter in a large skillet over medium-high heat. Add the onion, parsnip, and celery. Sauté for about 5 minutes until the onion becomes translucent. Remove from the pan and place on a plate/bowl.
- Cook the chicken livers: Add another 2 tablespoons of butter to the same pan. Add the chicken livers and sauté on medium heat for 5-7 minutes until they are slightly browned. You are not cooking them through yet, just getting some color on them.
- Simmer everything together: Add the veggies you put aside, one cup water and the bay leaf to the chicken livers. Simmer for about 20 minutes on medium-low heat, stirring often and making sure the livers are evenly cooked. Don’t brown. Just simmer gently. The pan should stay moist and not dry, so if you need to add more water, you can, but not too much. At the end of the 20 minutes, most of the water should have evaporated.
- Test for doneness: After 20 minutes, taste a piece of celery. If it’s cooked and not crunchy, remove the pan from heat and remove the bay leaf. If not, add a bit more water and continue to simmer until done. For the chicken livers: the internal temperature should read 165°F (74°C). You can cut one open and there should be just a faint hint of pink.
- Blend immediately while still very warm. Transfer everything straight from the pan to the food processor or high-powered blender. Warm livers emulsify the butter into a smooth, creamy texture.
- Add final ingredients: Add the rest of the butter, lemon juice, nutmeg, and salt to taste. Blend until completely smooth and creamy. Taste and adjust seasoning.
- Refrigerate and serve: Transfer to glass jars or ramekins. Press plastic wrap (cling wrap) directly onto the surface before sealing, or pour a thin layer of melted butter over the top instead. The butter seal is the more traditional method and looks beautiful. Press a sprig of thyme, parsley or a few pink peppercorns in before it sets if you like. Refrigerate for at least 2 hours.
- Serve at room temperature. Take the pâté out of the fridge about 20 minutes before serving. It's stiffer when cold and the flavor is more muted.
Notes
- Slice the celery finely. It’s the one vegetable that won’t fully disappear in the blender. Thin slices mean no stringy bits.
- Check for green before you start. Any green-tinged piece of liver goes in the bin. It’s bile, and it makes pâté bitter.
- Season at the end. Butter and livers vary in saltiness. Always taste and season after blending, not before.
- Let it rest before serving. The pâté is good after 2 hours but noticeably better the next day. Take it out of the fridge about 20 minutes before serving. Cold pâté is stiffer and the flavor is more muted.
- Refrigerator: The butter seal is the more traditional method and keeps the pâté for up to 5 days. To do it: melt a few tablespoons of butter gently, let it cool slightly, then pour a thin layer directly over the surface of the pâté and refrigerate until set. If you’d rather use plastic wrap (cling wrap), press it directly onto the surface with no air gaps. Without either, the surface will turn gray within a day or two. Not spoiled, just not pretty.
- Freezer: I haven’t personally frozen this pâté, but readers report it freezes well in portions for up to 3 months. Defrost overnight in the fridge and give it a stir before serving. The texture may be slightly less smooth after thawing.
- Make ahead: The flavor is genuinely better on day two. Make it the night before and you won’t have to think about it again until people sit down.